
When Will I See Key Growth Stages in My Moringa Plant?
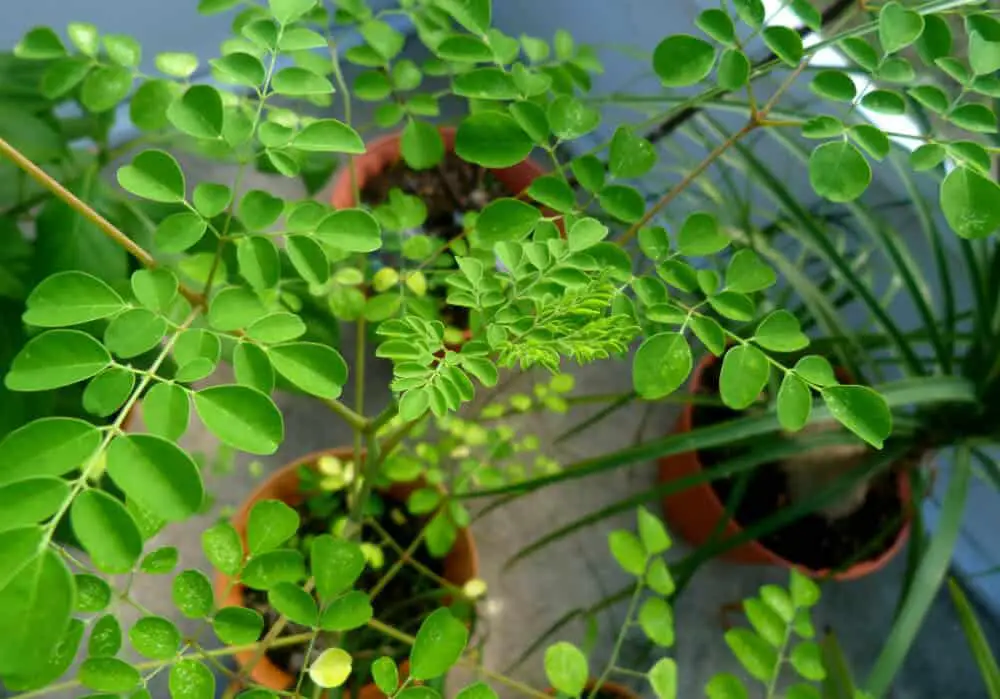
Moringa stands out as one of the fastest-growing plants, with its seedling stage being the most time-consuming, often taking a month or two to surpass the 1-foot milestone. Even the seeds themselves can take 1 or 2 weeks to fully germinate.
Around the 2-foot mark, typically reached within 3-4 months, Moringa seedlings exhibit remarkable growth, especially for a fast-paced plant. Following this point, the upward trajectory accelerates, with an average monthly growth of 1-2 feet in warm climates with sandy loam soil and proper watering. In 8-10 months, a Moringa tree is likely to reach 10-12 feet or between 3-4 meters. By the end of the first year, it may stretch to a height of 12-15 feet.
However, if harvesting leaves is your intention, it’s advisable not to let the Moringa tree grow too tall. As it surpasses certain heights, pruning becomes more challenging. Trimming leaves before they reach that point is recommended.
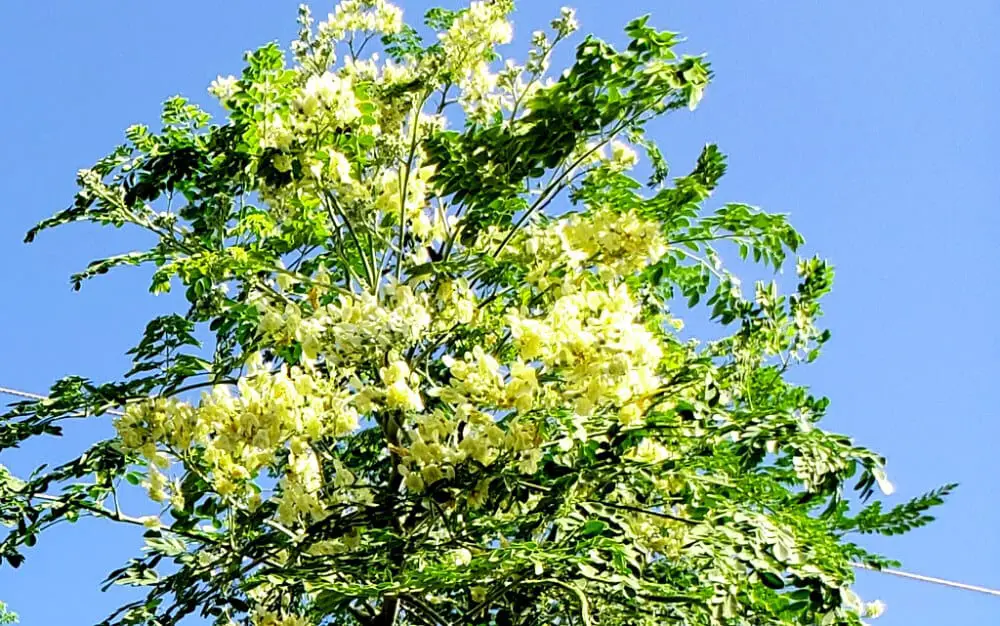
For those considering Moringa trees for shade, windbreak, or similar purposes, a fully-grown Moringa tree can reach an impressive 30 to 40 feet in height and approximately 2 feet in diameter at breast height.
If you let a Moringa tree be, it’ll shoot up to impressive heights in no time. So, how can you foster its growth for the fastest results?
How to Maximize Growing Conditions
Moringa trees flourish in Zones 8-11, thriving in warm climates that seldom experience freezing temperatures, even during winters. It’s no surprise given Moringa’s origin in northern India, where temperatures rarely drop below 40 degrees F even in the coldest months.
Living in a warm environment is already a plus for your Moringa, as it thrives in higher temperatures. But what other steps can you take to ensure your Moringa trees are not just healthy but also growing at an impressive pace?
Step One: Make Sure to Give Your Moringa a Good Chance of Germinating
When it comes to germinating Moringa seeds, we’ve found that soaking them and allowing them to germinate indoors is the most effective method.
Here’s a helpful tip: for optimal results, consider planting your Moringa seeds in early spring, especially if you plan to start them in pots before transplanting. Ensure you wait until the threat of frost has passed.
Initiate the germination process at this time, and your trees will be well-prepared to harness the summer heat for their upcoming growth spurts.
To kickstart the process, soak your Moringa seeds in water for 24 hours.
After the soaking period, gently place them on a paper towel, taking care not to handle them roughly or apply excessive pressure while drying.
Now, transfer the seeds to a Ziploc bag. Store the bag in a dark location, such as the interior of a closet, maintaining a warm temperature, ideally no cooler than 70 degrees F.
Most Moringa seeds will germinate within 3-7 days, though occasionally it might take up to a week. Regularly check on your seeds. Since Moringa shoots are delicate, excessive growth in the bag may lead to breakage. As soon as you observe germination, promptly remove the seeds.
Step Two: Use Sandy Loam Soil
Moringa, known for its hardiness, can withstand extreme heat, endure drought, and even thrive in less-than-ideal soil conditions. However, it has a preference for loam soil, and if you provide it with this, you’ll witness faster growth.
Sandy loam, composed of silt, sand, and clay, offers the ideal mix. Clay provides a stable base for Moringa roots, sand ensures proper drainage, and silt allows for a harmonious blend of clay and sand.
When preparing your Moringa container, fill it two-thirds with sandy loam soil. Various containers like plant pots, paper cups, and mugs are suitable, but make sure they are at least 6 inches tall, preferably taller.
Considering Moringa roots grow deeply, a shallow container might stunt the tree’s growth, even if you plan to transplant it later.
Use your finger to create a hole about an inch deep and one to two inches wide, placing your Moringa seed in this space.
Crucial tip: as your Moringa seeds germinate, expect to see two shoots, not one. One shoot will display tiny leaves or frills at the end and will eventually become the trunk, while the other will develop into the roots.
Plant your Moringa seed in the soil root-side down, lightly covering it afterward. This step ensures optimal conditions for robust Moringa growth.
Step Three: Give it Sun
Regardless of whether your Moringa tree is indoors or outdoors, make sure it gets direct sunlight.
For indoor cultivation, position your Moringa near a west- or south-facing window to maximize sun exposure. Keep those blinds wide open whenever possible.
If cultivating Moringa in an outdoor setting, choose a location that receives abundant sunlight. Ensure that larger trees or buildings don’t cast shadows, and prioritize sun exposure, particularly during the afternoons and evenings. Remember, a sun-soaked Moringa is a happy Moringa!
Step Four: Water Your Tree More Frequently When It’s Young
While Moringa’s resilience against drought is a plus, the fast-draining nature of sandy loam soil demands attentive irrigation.
During the initial months, focus on maintaining consistently moist soil. In the first month, water your Moringa daily, enough to dampen the soil without waterlogging it. If water accumulates and doesn’t drain within 5-10 seconds, you’ve watered too much; adjust accordingly.

As your tree reaches around a foot in height, reduce the watering amount. Ensure the soil remains damp but not excessively wet. Daily watering is still recommended, but occasional lapses won’t harm—simply resume the routine the next day.
Around the time your Moringa hits 2-3 feet in height and its trunk starts to harden, consider transplanting it outside if that’s your plan. This stage, typically in month 2, is optimal for transplantation while the trunk is still supple.
From month three onward, gradually decrease watering to twice a week, or less if you experience sufficient rainfall. By month four, your Moringa tree, standing at least 3-4 feet tall, with a hardened trunk, will be well on its way to self-sufficiency.
Height Checkpoints for Moringa Trees: Monitoring Growth Success
It’s crucial to keep tabs on your tree’s height at each stage to ensure you’re on the right path.
Moringa tree height should ideally reach around 2 feet at 4 months, 12 feet by the end of the first year, and exceed 20 feet by the second year.
If your Moringa tree isn’t hitting these growth milestones, double-check its sunlight exposure and nutritional intake to ensure it’s thriving as expected.
Moringa Tree Growth Rate
Given the target heights of 2 feet at 4 months, 12 feet by a year, and over 20 feet by year 2, a rough estimate suggests a monthly growth rate of approximately 9.2 inches without any trimming.
Conclusion
In summary, a Moringa tree at the 4-month mark is already quite resilient and can thrive on available rainfall, growing at its own pace.
However, by offering the right care, water, sunlight, and soil during its seedling stage, you set the stage for optimal growth conditions. This careful attention ensures that your Moringa tree not only survives but continues to flourish rapidly into adulthood.
Feel free to drop your questions in the comments, and explore the website for more valuable information!

For years now, Moringa has been a daily consumption in my life, incorporated in various forms such as capsules, food recipes, and soothing teas. Initially, my daughter and I embarked on this journey as an experiment, but as time went on, I delved deeper into its remarkable potential and unearthed the unlimited benefits it offers for our well-being and health. I got motivated by how much it positively impacted me and decided to share my insights about Moringa’s profound impact on health and overall living through my blog posts.