Essential Steps for Planting Moringa Seeds
Starting to grow a Moringa tree is like opening a door to a world of good things for your health and an amazing way to garden. People also call it the ‘drumstick tree’ or ‘miracle tree.’ It’s super healthy, and growing it can be fun, even if you’re new to gardening.
In this guide, we’ll talk about the steps and tips to help you grow this awesome tree.
A Moringa tree is grown in tropical conditions, these trees need six to eight hours of full sunlight, slightly acidic to neutral soil, and temperatures ranging from 77 to 95 degrees Fahrenheit.
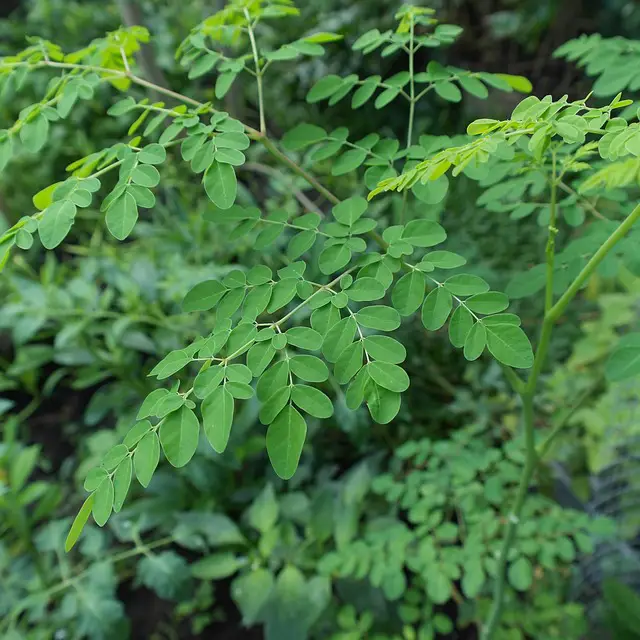
Indigenous people have long recognized Moringa trees’ nutritional and medicinal qualities, often called the ‘miracle tree.’ Every part of the tree, including seeds, foliage, and roots, is edible and serves as a rich source of nutrients and antioxidants comparable to spinach.
Moringaoleifera trees are not only native to Asia and Africa but also highly versatile and fast-growing. The fruit pods are a regular part of diets in southern Asia.
Gardeners appreciate these trees for their rapid growth from cuttings and seeds, adaptability to poor soil, and ability to withstand drought. The unique root system, consisting of a taproot and numerous feeder roots, contributes to their resilience.
All parts of the Moringa tree, such as seeds, fruit pods, and leaves, are edible and believed to provide many health benefits, including improved sleep, blood sugar regulation, and reduced joint pain. The leaves and seeds are particularly rich in iron, fiber, vitamins C, B, and A.
If you are interested to learn more about Moringa’s nutritional facts, you can check out out this article we wrote below:
Steps to Grow a Moringa Tree from Seed
Step 1: Choose a Sunny Spot
Select a sunny spot with soil that drains well for your Moringa tree. Moringa thrives in sunlight, so find a place where it can soak up the rays.
Step 2: Get Fresh Seeds
Acquire fresh Moringa seeds from a reliable source. It’s crucial to start with quality seeds to ensure a healthy start for your tree.
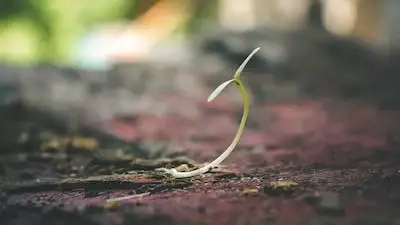
Step 3: Soak Seeds and Plant
Soak the Moringa seeds in water for about 24 hours. This helps in the germination process. Plant the soaked seeds about an inch deep in loose soil. Ensure the soil is well-aerated to support healthy root development.
Step 4: Water Carefully
Keep the soil moist until the Moringa seeds germinate once your tree is established; water regularly, especially during dry spells.
Step 5: Provide Support
Stake young Moringa plants if needed. This provides support as the tree grows, especially during its early stages.
Step 6: Prune and Shape
Prune your Moringa tree to encourage a desired shape and stimulate bushier growth. Regular pruning can help maintain a healthy and manageable tree.
Step 7: Harvest and Utilize
Once your Moringa tree reaches a height of about three feet, start harvesting the leaves regularly. You can also harvest the long pods for culinary use. Utilize the entire tree, including the seeds, which can be harvested for planting or extracting oil.
These steps provide a simple guide to cultivating a thriving Moringa tree. Adjust your local climate and soil conditions to achieve optimal results.
If you’re also wondering about the benefits of using Moringa as a fertilizer and the benefits it can provide to your garden, you can check out this article below:
How to Care For Moringa Plant
Taking care of established Moringa trees is easy, requiring minimal attention, mainly when grown outdoors throughout the year.
- Gardeners outside tropical or subtropical regions should ensure they bring their Moringa plants indoors during the colder months.
- They thrive in container cultivation, demonstrating optimal performance when placed in containers with a minimum diameter of 30 inches.
- As a deciduous plant, Moringa drops its leaves in more relaxed, cold areas during autumn.
- In the cooler season, it is recommended to prune the trees to a height of about 2 meters.
Pruning Moringa plants in pots during the winter is recommended to encourage spring growth.
The ideal garden soil for cultivating a Moringa is loamy, enriched with ample compost, and well-weathered manure. This preference stems from Moringa’s affinity for well-drained and somewhat acidic soil.
Planting it on a mound ensures adequate drainage of excess water from the roots, especially in areas with frequent rainfall.
Common Problems of Moringa Tree
Growing Moringa tree from seed is generally low-maintenance, with good resistance to problems. However, there are a few things to be aware of:
Yellowing Leaves
Moringa leaves may turn yellow due to excessive watering, insufficient water, or low nutrient levels in the soil. Check the soil’s moisture level, placing your finger about an inch deep; water the plant if the soil seems dry. If all the leaves are turning yellow, it could be a lack of nutrients or sunlight. Fertilize the plant and consider relocating it to a spot with more light.
Browning or Dying Branches and Leaves
Problems with soil drainage, frequently resulting in root rot, may lead to the browning and death of branches and leaves. Ensure the plant is in well-draining soil. Improve drainage by adding sand, perlite, peat moss, or compost to the soil.
Poor Growth
Moringa trees usually grow fast. If growth is stunted, it could be due to insufficient sunlight, lack of nutrients, or exposure to cold temperatures. While Moringa can handle brief cold snaps, prolonged cold can be fatal. Bring the tree indoors if cold weather is expected. If the tree receives enough sunlight but still struggles, it may need additional nutrients or compost. Fertilize or add compost to enrich the soil.”
Pest Infestation
Although generally resistant to pests, Moringa trees occasionally face pest issues like aphids, caterpillars, or whiteflies. Look for unusual spots, holes, or wilting on the leaves, which may indicate a pest problem.
Introduce natural predators or use organic pesticides to address the issue, ensuring the tree’s continued health and growth. Regularly inspecting the leaves and branches can help catch and manage pest infestations early on.
Conclusion
Growing a Moringa tree is a rewarding and straightforward process that starts with picking the right spot and getting good seeds. It is essential to ensure it gets plenty of sun and has well-draining soil for the tree to thrive.
You must soak and plant the seeds, water them carefully, and support their growth. Giving the tree the help it needs and shaping it through pruning will keep it healthy and looking good. Once the tree is ready, you can harvest the leaves, pods, and seeds to enjoy the nutritional benefits.
Make sure to adjust these steps based on your specific growing conditions and enjoy the journey of growing a Moringa tree – a challenging and valuable addition to any garden or landscape. Happy growing!
Sources
https://www.sciencedirect.com/science/article/pii/S2666154322001302
https://www.medicalnewstoday.com/articles/319916
https://moringafarms.com/growing-moringa/
https://balconygardenweb.com/growing-moringa-tree/
https://plantophiles.com/gardening/moringa-tree/
https://www.strongharvest.org/growing-and-using-moringa/

Tara is a nutrition enthusiast with a passion for superfoods like Moringa and pomegranate. She has over 10 years of experience as a professional writer and researcher and specifically covers topics around the health benefits of superfoods, and provides readers with valuable knowledge and insights.