
Moringa generally begins its harvest preparations during the fall season. In the northern hemisphere, the initial signs of ripening Moringa pods may become noticeable around August, with the later ones maturing in October. However, the prime harvest period typically unfolds in September.
Now, the question is: How can you determine when your Moringa seeds are ready for harvesting? And what is the best method for harvesting them?
If you are interested to learn more about growing Moringa in cold climates, check out the article here.
How to Harvest Moringa Seeds and Pods
The time to harvest Moringa seeds is when the pods have dried and turned brown. The typical procedure for a Moringa seed harvest involves gently twisting the pods from the trees. Afterward, the pods are carefully split in half, and the seeds within both halves are scraped and harvested.
How do I Know if My Moringa Seeds are Ready to Harvest?
The easiest way to determine if your Moringa pods are ready for harvest is when they have become dry and turned brown.
Initially, Moringa pods emerge as long, thin structures. In their early stage, when they resemble young and slender green beans, these pods are edible, but you’ll lose out on the seeds.
Over the next month or two, these pods will undergo growth and thickening, eventually bulging with dozens of seeds. Gradually, they transform into a lush green color, varying in thickness from as slim as a finger to as thick as a flute. They’ll look delicious and the pods can be eaten. There are recipes like the Moringa drumstick curry from Roti n Rice that I love. But if your goal is to harvest the seeds, resist the temptation and leave the pods on the tree.
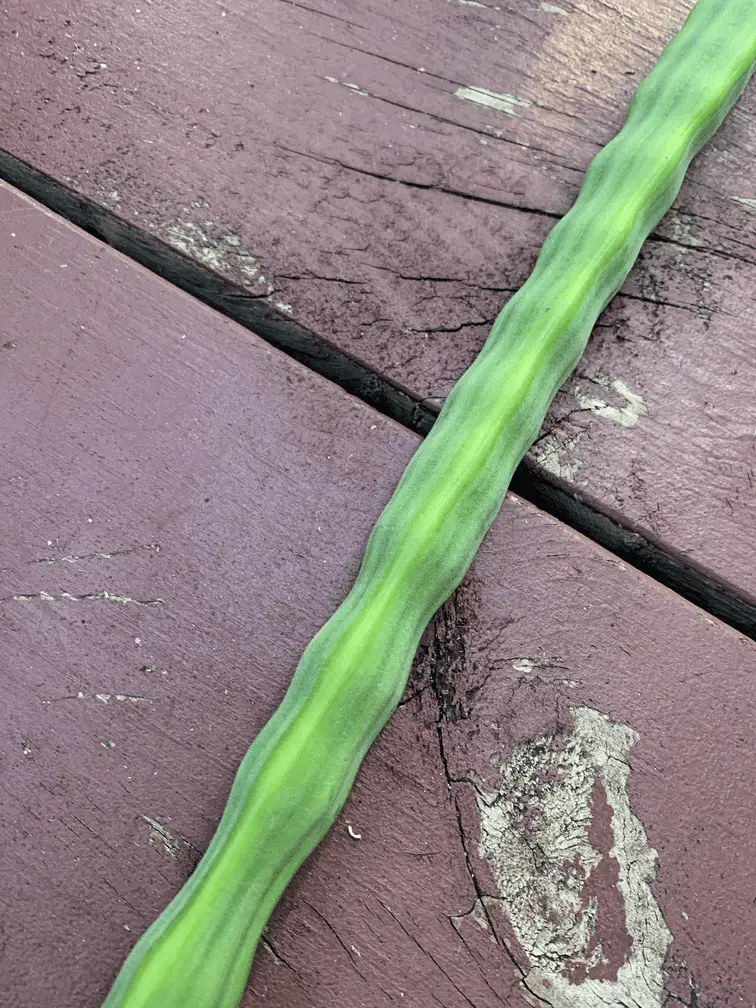
The image above is a lush, green Moringa pod, and the seeds are not yet ready to harvest!
Over the next few weeks, you’ll observe the Moringa pods gradually turning brown. Initially, they may display a nice mix of green and brown, and the urge to start plucking them from the tree may arise. However, it’s crucial to resist this temptation as they are not yet ready for harvest!
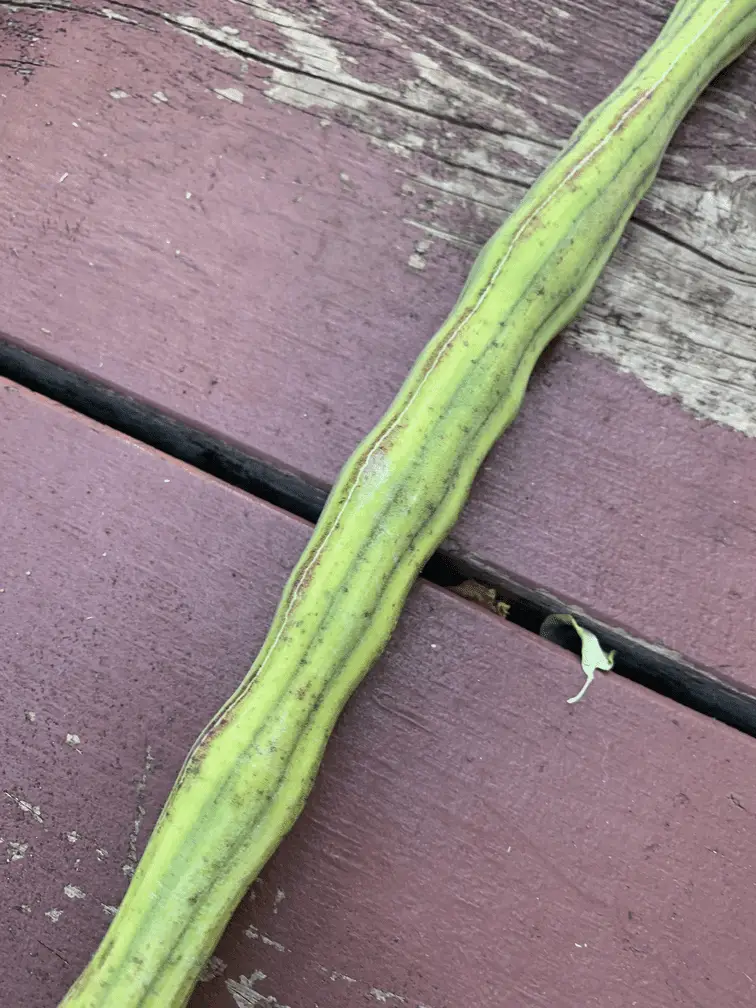
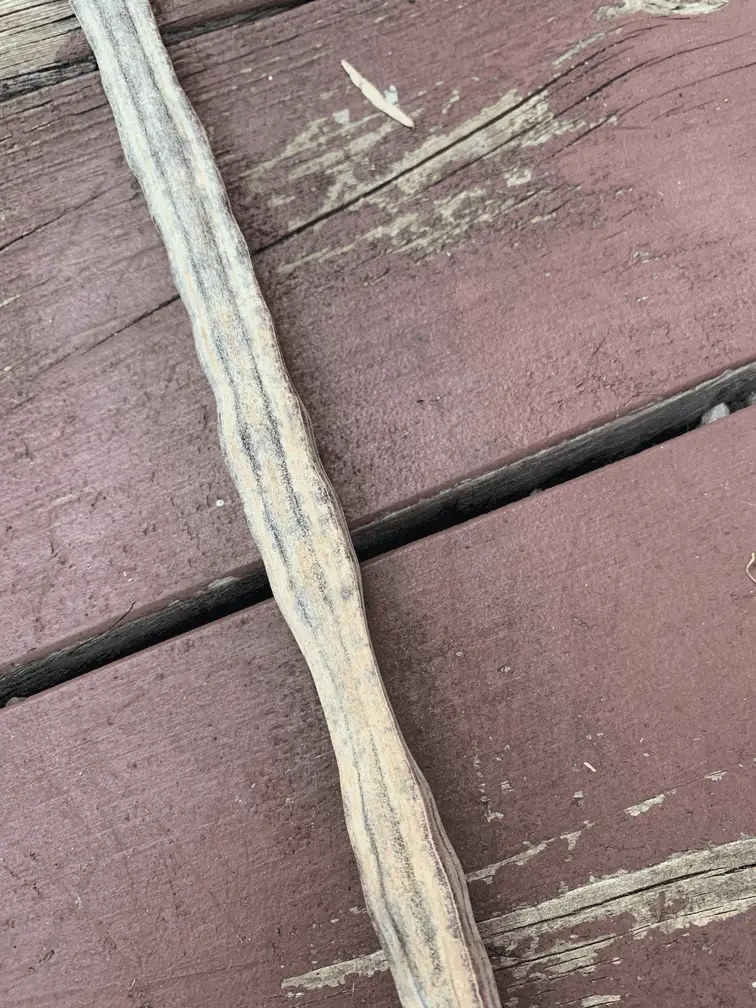
Wait until the pods have transitioned into a pale, brown/tan color, and the husk appears dry. It’s worth observing if a few drumsticks naturally start to come apart, releasing a few seeds to the ground. Then, and only then, are the pods ready for harvest.
How to Harvest the Moringa Pods From the Tree
While some fruits and vegetables demand an extraordinary amount of effort to harvest (yes, artichokes, I’m looking at you), the process of removing Moringa pods from Moringa trees is almost as effortless as snapping off a branch. In fact, it’s so simple that gravity sometimes takes care of it on its own.
While this simplicity makes harvesting pods straightforward, it can also result in a big mess if you’re not careful.
To harvest the pods effectively, grab the pod by the top, approximately 1 inch below the stem. Note: Avoid gripping the middle or bottom of the pod, as doing so increases the chances of the pod snapping open and scattering seeds everywhere.
If a pod is positioned too high for easy reach, attempt to gently bend the branch or trunk towards you until it comes low enough for you to grab the top of the pod.
Once you’ve grabbed the Moringa pod near the stem, gently twist it until it snaps off. The GIF below will illustrate how easily the pod should snap off.
Extracting seeds from dry Moringa pods is just as uncomplicated as harvesting the pods from the tree. When Moringa seeds are ready for harvest, the pod should have turned brown, become dry, and easily split open. Occasionally, you might notice that some Moringa pods have started to split on their own.
Before you proceed, ensure you’re seated at a table or have a designated space to collect falling seeds. Crackling open Moringa pods often results in seeds scattering, so having a designated area to catch them prevents the need to bend over repeatedly.
Once you’ve taken the pod off the tree, hold the end of the pod between your fingers, with the stem end often working best. Squeeze the pod firmly, and a crack in the seam should appear. Grasp both sides of the Moringa pod along the seam and gently pull it apart, being ready to catch any falling seeds!

Once you’ve collected your Moringa seeds, store them in a cool, dry location until they’re ready to harvest in spring.
And that’s really all there is to it!
Some Background About Moringa Seed Pods
Moringa seed pods are harvested directly from the Moringa tree, and inside, you’ll find numerous seeds that are edible, similar to peas.
Simply cut them open, extract the seeds, and you’re already halfway through the process! It’s important to note that these seeds need to be cooked first. However, once dried, they become edible!
A quick tip: Consuming an excessive amount of these seeds may have a laxative effect. It’s advisable to limit intake to one or two seeds per day.
The seeds are rich in various essential vitamins, and after being dried and peeled, they can be ground to create excellent powders.
Globally, many people utilize these powders on their skin and body for relieving aches and pains, often combining them with Coconut Oil.
And in various regions, it’s a common practice to find chopped Moringa Seed Pods added to different curries and soups, with smaller pods being preferred for such culinary uses.
Helpful Tips for Harvesting Moringa Leaves
Gathering Moringa leaves differs significantly from harvesting Moringa seed pods.
Moringa Oleifera stands out due to its unique vertical growth pattern, avoiding a dense, bushy appearance.
However, a clever technique involves “tricking” the Moringa Oleifera tree into adopting a horizontal (bushy) growth, maximizing the chances of growing more Moringa leaves in the long run.
Assuming you’re familiar with planting Moringa seeds and may even have some Moringa seedlings, here’s how to go about it:
Contrary to common belief that only mature, flowering trees should be harvested for Moringa powder, the key is to start harvesting leaves when your Moringa Oleifera tree reaches around 70 centimeters in height! Trim the main branch (not the side branches) down to approximately 40 or 30 centimeters. Repeat this process until your Moringa Oleifera tree adopts a horizontal growth pattern instead of a vertical one.
Conclusion
In summary, harvesting Moringa involves a careful timeline and attention to various cues. The process begins in the fall, with pods ripening from August to October, reaching their prime in September. Knowing when to harvest seeds involves waiting for dry, brown pods (as indicated in the pictures above). Harvesting pods from the tree is a relatively simple task, but it requires patience and attention to the pod’s color and dryness. Extracting seeds from dry pods is straightforward, involving a careful process to avoid scattering.
Harvesting Moringa leaves follows a different strategy, encouraging a bushy growth for maximizing higher number of leaves grown. Understanding these techniques ensures a successful Moringa harvest!

For years now, Moringa has been a daily consumption in my life, incorporated in various forms such as capsules, food recipes, and soothing teas. Initially, my daughter and I embarked on this journey as an experiment, but as time went on, I delved deeper into its remarkable potential and unearthed the unlimited benefits it offers for our well-being and health. I got motivated by how much it positively impacted me and decided to share my insights about Moringa’s profound impact on health and overall living through my blog posts.
If you have picked the seed too soon will the seeds still get brown inside if left alone?
they’ll continue to ripen, just like any other fruit!
You have made some really good points there. I looked on the net to find out more about the issue and found most individuals will go along with your views on this web site.
I live in San Diego area. It is now mid Dec. and only a few pods have dried and cracked open. What should I do about the pods that are not yet brown. If left on tree will they still produce viable seeds?